If you need to add voice-over to video, AI tools let you create natural narration fast. They cut production time and cost, and they scale well for translations and repeatable brand voice work.
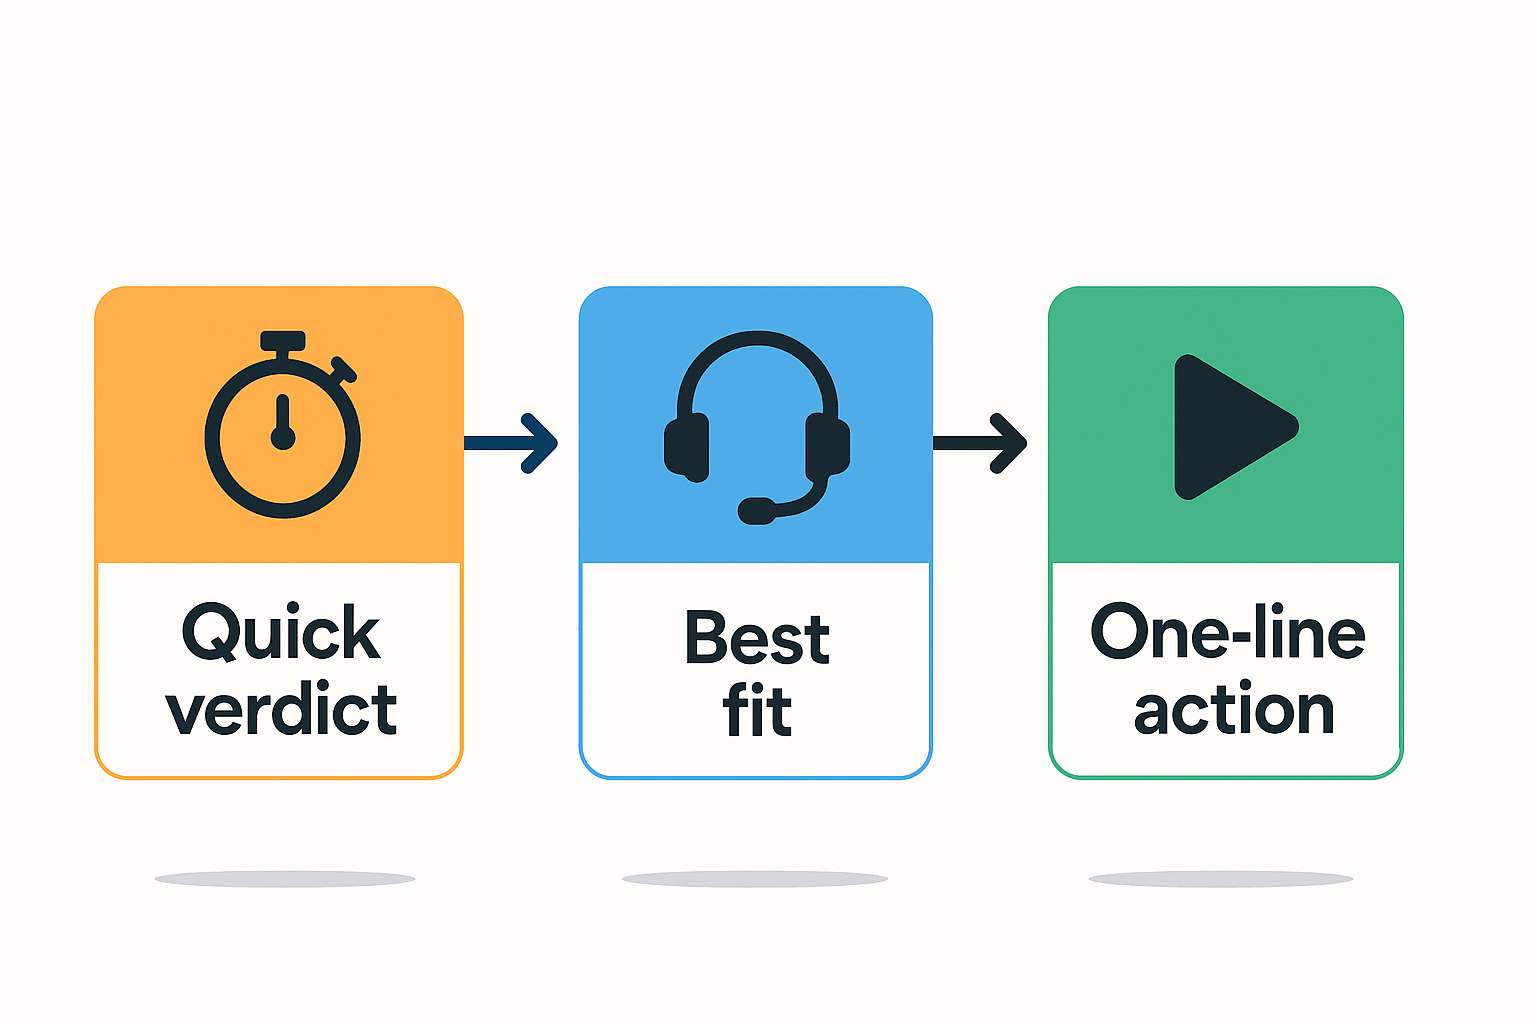
Best fit:
-
Individual creators and YouTubers who need fast narration and captions.
-
Marketing teams and small businesses localizing promos and ads.
-
E-learning producers and podcasters who want consistent voices at low cost.
Quick next step: record a 30 to 60 second sample, pick a target voice and language, then run a short AI pass to check pacing and tone. If the sample matches your expectations, expand to full videos and automate subtitles and alignment.
One-sentence verdict: AI voiceover is a practical, time-saving choice for most creators and teams, especially when you need multilingual dubbing or lots of short edits.
Why add a voice over to video (business & creative reasons)
Adding a voice over to video makes your content easier to follow, more accessible, and ready for new channels. A clear narration lifts engagement and helps viewers absorb complex ideas. It also speeds up localization and reuse for different markets.
Business benefits: reach, retention, revenue
Voiceovers expand reach by making videos usable in more contexts, like muted social feeds or translated markets. They can increase watch time and ad value, improve conversion in product videos, and cut localization costs versus hiring voice actors. For training and courses, narration reduces learner drop off and boosts completion rates.
Creative benefits: clarity and brand consistency
A good voice ties scenes together, sets tone, and keeps viewers focused. Use voiceovers to clarify visuals, add personality, or create consistent brand narration across episodes and ad campaigns. They also let you repurpose long form content into short clips with a unified voice.
Use cases and quick mapping:
-
YouTube: better watch time and searchability.
-
Online courses: higher completion and learner satisfaction.
-
Ads: clearer messaging and higher conversions.
-
Social clips: usable with captions or sound off.
For accessibility, the
Web Content Accessibility Guidelines (WCAG) 2.2 recommend providing text alternatives for non-text content, so pairing narration with captions widens audience access. If you want faster localization or stronger viewer retention, voiceovers are usually a smart investment.
How AI voice-over tools work (TTS, STT, dubbing) & advanced features
Adding voice over to video reliably means chaining several AI modules. This section explains the modules, how they connect, and when advanced features help. You’ll get practical notes on output quality and common artifacts.
Core modules and how they fit together
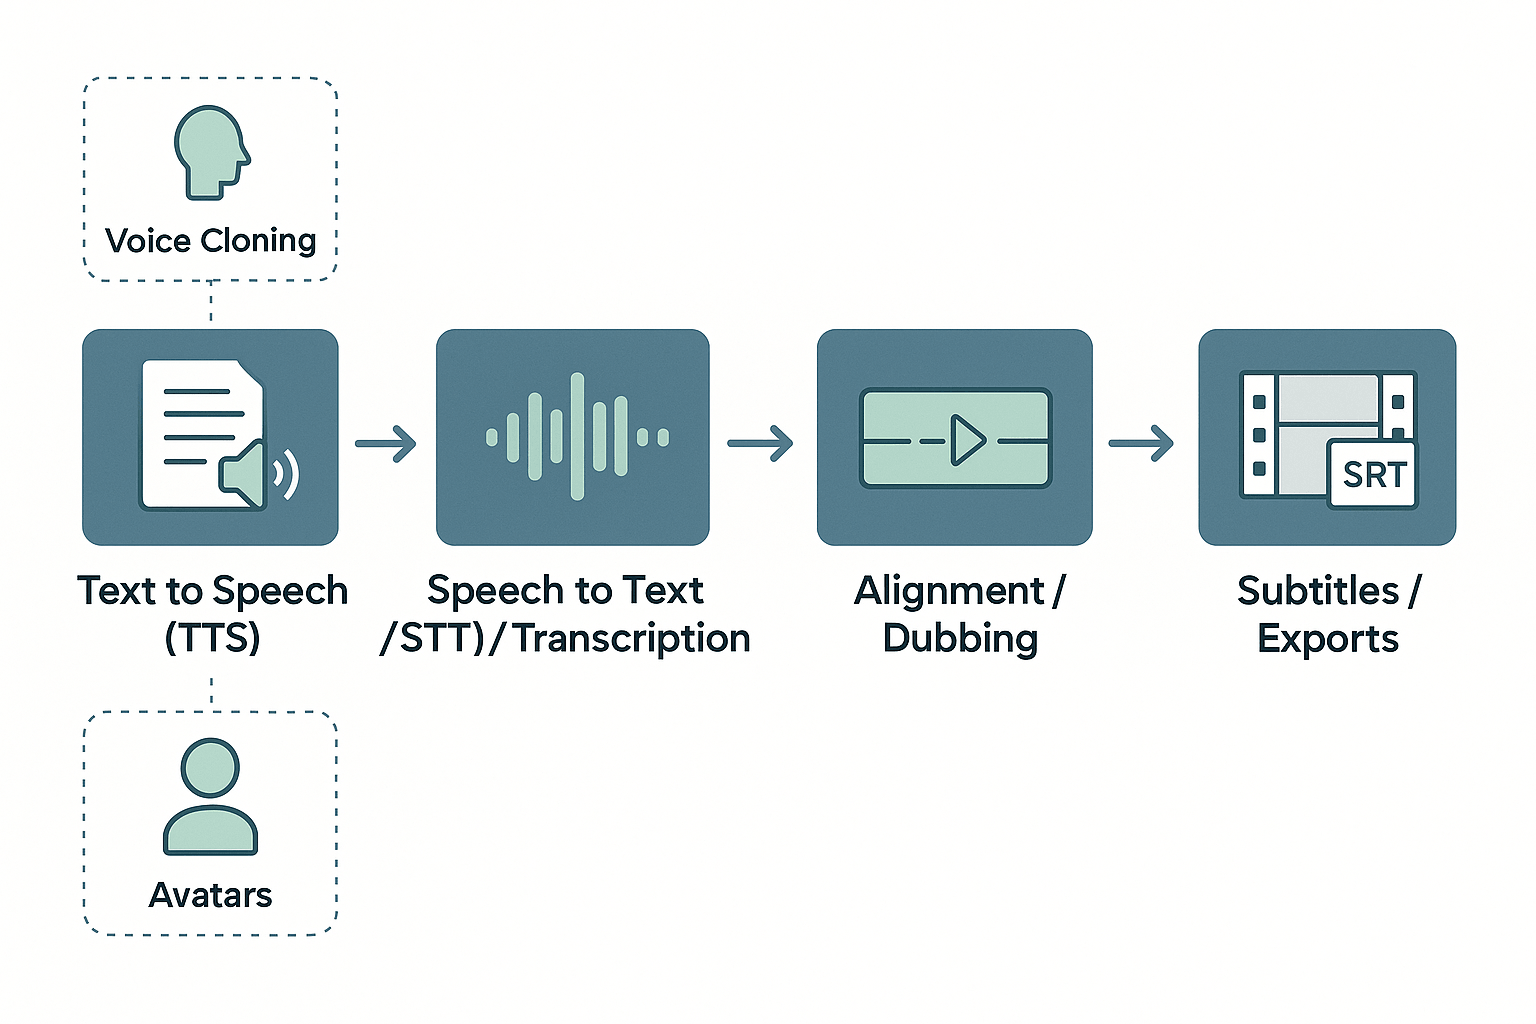
At the center are three building blocks: text-to-speech (TTS), speech-to-text (STT), and alignment or dubbing. TTS converts written text into synthetic speech. STT transcribes spoken audio to text for editing, translation, or timing. Alignment links audio to video timing so speech matches lip or subtitle cues.
-
Upload or record audio or script.
-
STT transcribes any source audio for editing or translation.
-
Translate text if needed, then TTS generates new audio.
-
Auto-alignment places phrases on the video timeline, creating dubbed tracks and subtitles.
Voice cloning and avatars, explained
Voice cloning creates a custom synthetic voice from a short sample. Avatars pair a voice with a talking character or photo for on-screen presence. Voice cloning needs clean recordings and consent, and avatars need visual assets and synced motion.
Output quality, limits, and common artifacts
Quality depends on model size, training data, and audio cleanup. Expect occasional timing drift, muffled consonants, or robotic cadence. Background noise, poor mic levels, or heavy compression make issues worse.
Common artifacts:
-
Misaligned syllables or words after translation.
-
Stiff prosody, where speech lacks natural pitch or rhythm.
-
Glitches at segment joins, like pops or abrupt volume changes.
When to use advanced features
Use standard TTS for quick narration and broad language coverage. Choose voice cloning when brand consistency matters, or when you need to preserve a host voice across languages. Pick avatars when you want on-screen personalities or reusable characters.
Advanced features add value when you need scale, speed, or brand fidelity. They cost more setup but cut dubbing time and reduce reliance on voice actors.
How AI voice-over tools work (TTS, STT, dubbing) & advanced features
Adding a voice track to video now usually uses several AI building blocks working together. In this section I explain the main modules, how they chain into a pipeline, and what to expect from output quality when you add voice over to video. You’ll get clear rules for when to use standard text to speech or reach for cloning and avatars.
Core modules and what each does
AI voice work rests on five core modules that handle text, speech, and synchronization. They stack together so raw content becomes a polished audio track that matches the video. Know their limits and you’ll pick the right tool for each job.
-
Text to Speech (TTS): Converts written scripts into audio using neural voices. TTS handles narration, offers styles, and scales fast. Output is clean but can sound synthetic on tricky phrasing.
-
Speech to Text (STT): Transcribes spoken audio into editable text. STT powers subtitle creation and script extraction. Accuracy drops with noise or heavy accents.
-
Auto-alignment and dubbing: Matches audio to video timing and lip movements when possible. Alignment uses timestamped transcripts and phoneme models. It saves manual timing work but may need fine tuning.
-
Voice cloning: Creates a custom synthetic voice from a short sample. Clones keep brand voice across languages but require consent and quality checks. Multilingual clones need more voice data for natural results.
-
Avatars and talking photos: Drive a visual character to speak the synthetic audio. Avatars add engagement for social and training videos. They require head and face models so sync quality varies.
How they fit together in a pipeline
A clear pipeline makes projects repeatable and fast. Here is a typical flow you can copy.
-
Transcribe source audio with STT, or write your script if none exists.
-
Edit the transcript into the final script, then pick voice style and language.
-
Generate TTS or a cloned voice recording for each script segment.
-
Auto-align audio to video frames and fix timing where needed.
-
Export final audio, burned-in subtitles, or a dubbed MP4 ready to publish.
Output quality and common artifacts
Expect good results quickly, but know common issues so you can fix them. Small edits usually remove most problems.
-
Robotic prosody: monotone or odd emphasis, fixable by changing voice style or adding punctuation.
-
Mis-timed phrases: short jumps or overlaps, fixable by nudging alignment markers.
-
Pronunciation errors: proper nouns or acronyms may sound wrong, fixable by phonetic spellings.
-
Background hiss from source audio: use denoise tools before STT for better transcripts.
When to choose cloning or avatars vs standard TTS
Standard TTS is fast, cheap, and fine for tutorials and ads. Use cloning when brand consistency matters or you must preserve a host voice across languages. Avatars add visual personality for marketing, courses, or social reels, but they add cost and complexity. Choose cloning when you need the same voice every video, and pick avatars when a talking face improves comprehension or engagement.
Step-by-step: Add voice over to video with DupDub (easy tutorial)
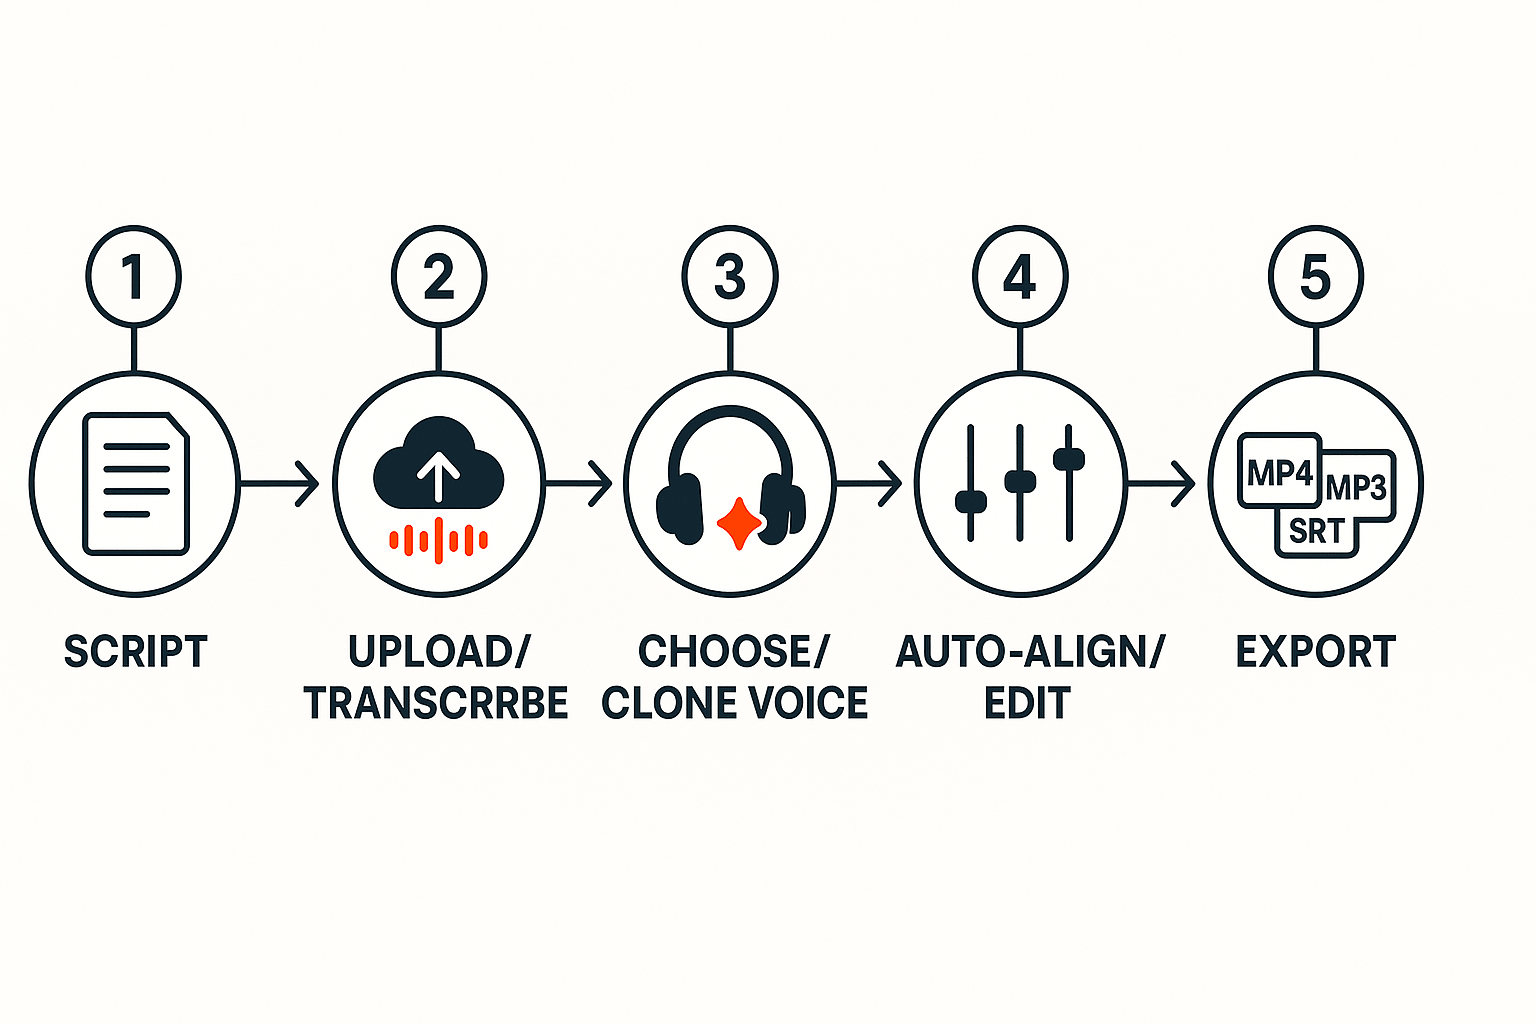
Want a fast, professional voice track? This short guide shows how to add voice over to video using DupDub. Follow these clear steps: prepare a script, upload and auto-transcribe, pick or clone a voice, align timing, polish audio, and export MP4/MP3/SRT.
1. Prepare your script or transcript
Write a short script or use an existing transcript. Keep sentences simple. Mark tone and pace notes in brackets, for example [calm], [fast].
2. Upload and auto-transcribe
Upload your video to DupDub, or drag in the audio. Use the auto-transcribe feature to get timestamps. Review and correct any transcription errors before moving on.
3. Choose or clone a voice
Pick from 700+ voices and 90+ languages, or upload a 30 second sample to create a voice clone. Name the clone so you can reuse it across videos.
4. Set language, timing, and alignment
Set the target language and enable subtitle alignment. The tool auto-syncs speech to on-screen lines. Manually nudge short clips if a line looks off.
5. Fine-tune audio and style
Use the studio to adjust pitch, speed, and pauses. Add contextual sound effects if needed. Preview full playback and adjust levels for consistent loudness.
6. Export MP4, MP3, and SRT
Choose file format: MP4 for video, MP3 for audio, SRT for captions. Export with burned-in subtitles or separate SRT files for platforms.
Quick tips and privacy note
Keep sentences under 15 words for clearer synthesis. Use a neutral voice for translations, and an energetic tone for promos. DupDub locks voice clones to the original speaker and uses encrypted processing to protect data.
Best practices for professional-sounding voiceovers
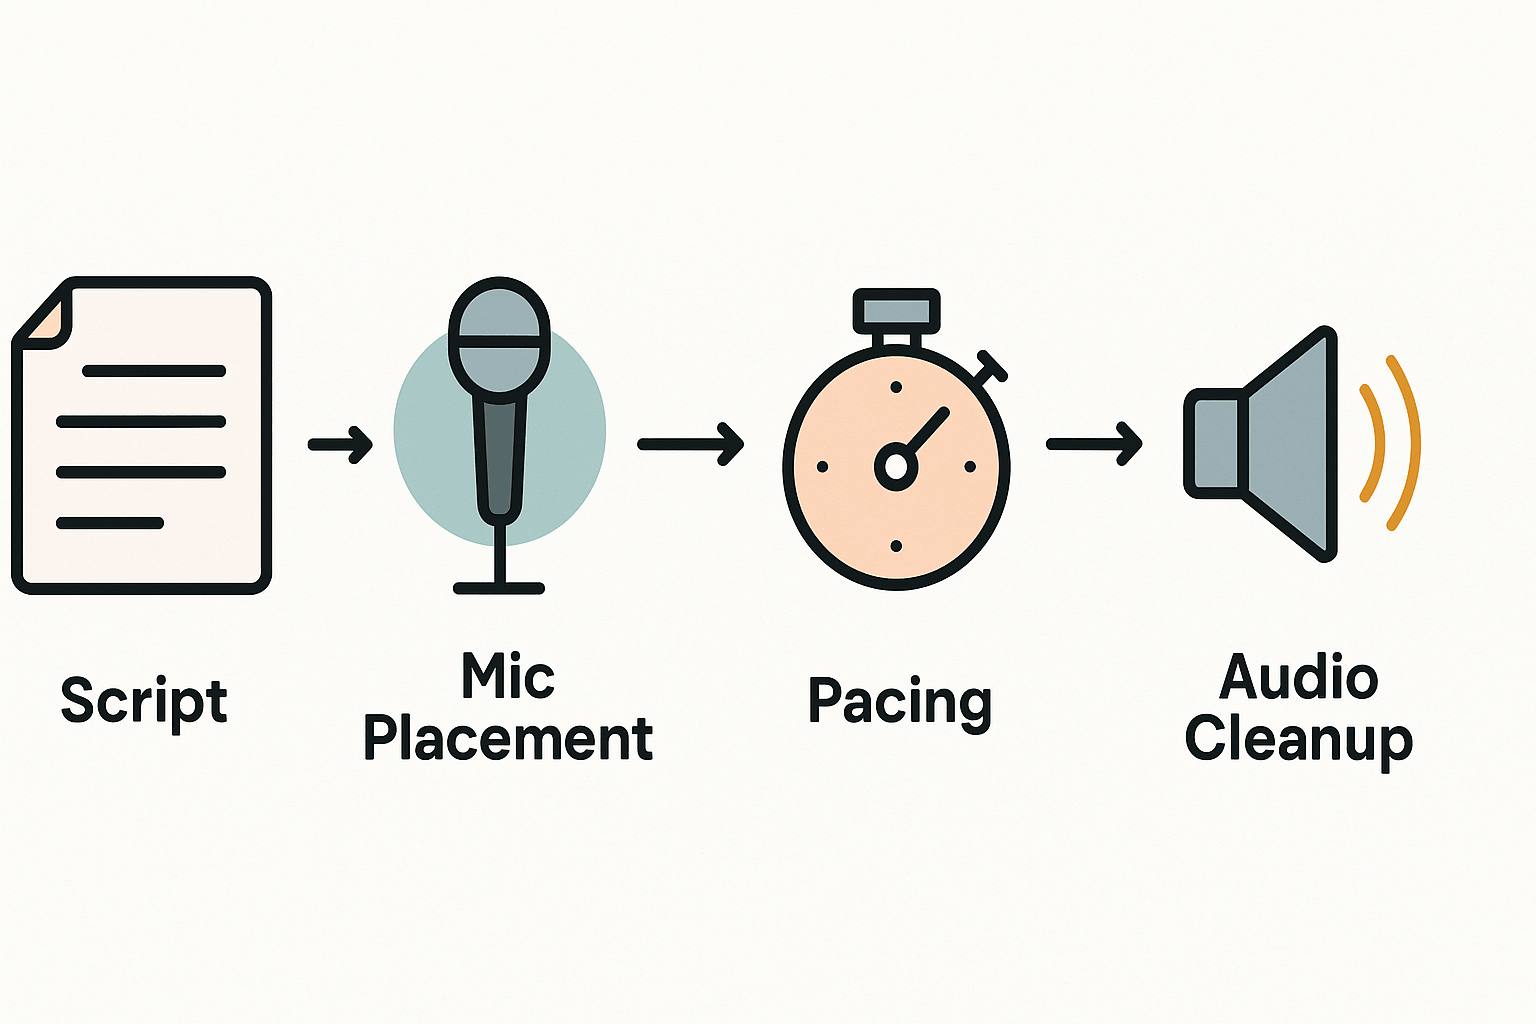
Good voiceover makes videos feel alive. These practical checks help you add voice over to video with more naturalness and authority, and they cut editing time. Follow short scripts, simple pacing habits, and quick audio cleanup to make AI voices sound human without special gear.
Write short, conversational lines
Keep lines short and direct. Short lines are easier for an AI voice to say naturally, and they read better on screen. Try one idea per sentence and use contractions.
Pace with natural pauses
Add commas and short breaks to show pacing. Pause slightly after questions and key points, and avoid rushing. Natural pauses give viewers time to process the message.
Pick a voice style that matches your audience
Choose tone and speed to fit your viewers: upbeat for social clips, calm and clear for e-learning. Preview a few voices and pick the one that sounds like your brand.
Quick audio cleanup and mic tips
You don’t need pro gear to sound good. Use light noise reduction, a small high-pass filter to remove rumble, and mild EQ to brighten voice. Check these quick steps:
-
Mic placement: 6–12 inches from mouth, slightly off-axis to cut plosives.
-
Noise reduction: remove hiss, not character.
-
EQ: boost 3–6 kHz for presence, cut below 100 Hz for rumble.
These small checks save editing time and raise perceived quality fast.
How DupDub compares to top competitors
Choosing the right tool depends on scope. If you need to add voice over to video at scale, the platform's workflow matters as much as voice quality. This section compares DupDub to TTS-first and avatar-first rivals, and shows when end-to-end dubbing and voice cloning pay off.
End-to-end workflows beat one-trick tools for localization
DupDub bundles translation, speech-to-text, voice cloning, alignment, and export. That removes juggling files between apps. By contrast, many TTS providers focus on single-file narration or a voice library. Avatar platforms often prioritize lip-synced visuals, not bulk subtitle alignment.
Feature snapshot
|
Feature
|
DupDub
|
TTS-focused tools
|
Avatar-first platforms
|
|
Full video dubbing
|
Yes
|
No or limited
|
Limited
|
|
Voice cloning
|
Yes, multilingual
|
Some, limited languages
|
Rare
|
|
Subtitle alignment
|
Built-in
|
Usually add-on
|
Often yes
|
|
Avatars
|
Talking avatars included
|
No
|
Core strength
|
|
API & scale
|
Enterprise API
|
Varies
|
Varies
|
Which tool fits each use case
-
Localization at scale: DupDub. It keeps voice, subtitles, and timing together.
-
One-off narration or podcast clips: A TTS-only tool may be cheaper and faster.
-
Branded talking characters: Pick an avatar-first platform for polished visuals.
-
Studio voice match: Use DupDub or a specialist with high-quality cloning.
Practical tip: if you need translation, subtitle sync, and cloned voices in one flow, an end-to-end platform saves hours and reduces format errors.
Pricing, plans & ROI — pick the right DupDub tier
Start with the free trial, measure what you need, then match a plan. You can quickly estimate how many credits you need to add voice over to video by comparing your project hours and word counts to each tier, and choosing the avatar or voice clone limits that fit your workflow.
Estimate credits, hours and avatars
-
Use the plan hour estimates as your baseline: Personal roughly 25 hours of Standard TTS, Professional ~83 hours, Ultimate ~416 hours. Check avatar hours and voice clone counts too.
-
For transcription and subtitles, compare the minutes you’ll process to the plan transcription hours. Watch file-word caps: Personal 10,000 words per file, Professional 30,000 words per file.
-
If you’re unsure, start the 3-day free trial (no card required) and test one full video to measure credits consumed.
ROI snapshot: time and cost vs human dubbing
According to
AI Dubbing vs Human Dubbing: An Honest Cost Comparison (2026), Professional human dubbing costs typically range from
200 to 600 per finished minute, encompassing translation, voice talent, and studio recording expenses. For a 10-minute video that’s
2,000 to 6,000. By contrast, DupDub subscriptions or pay-as-you-go credits can reduce that to a small fraction, and cut turnaround from days to minutes.
Pick a plan based on scale:
-
Free trial: test quality, small projects.
-
Personal ($11/mo billed annually): solo creators, light monthly hours.
-
Professional ($30/mo billed annually): agencies, frequent creators.
-
Ultimate ($110/mo billed annually): high-volume localization.
-
Pay-as-you-go: one-off or irregular needs.
Troubleshooting & quick fixes
If you need quick solutions before you republish, this checklist helps fix common issues when you add voice over to video. It covers misaligned audio, robotic tone, bad pacing, and export errors, with fixes you can do in DupDub or your editor.
Quick fixes for common problems
-
Misaligned audio: open the subtitle/timeline panel, enable frame-level sync, then nudge audio by 100–300 ms. If auto-align fails, split the clip and realign the phrase.
-
Robotic tone: switch voice style or use a different voice. Add slight prosody changes and reduce ultra-synthetic settings. Try a short voice clone sample for a warmer result.
-
Bad pacing: cut long sentences into smaller clips, insert 200–400 ms pauses, or slow the speech rate by 3–8%.
-
Noise or artifacts: run AI denoise, then a light high-pass EQ. Export as WAV to preserve quality, then convert to MP4.
-
Export errors: shorten filenames, check file size limits, or re-encode at lower bitrate.
When to escalate and pre-publish checklist
Contact support for account, billing, cloning permission, or persistent bugs. Before publishing, run this checklist:
-
Full listen-through on desktop and phone
-
Verify lip-sync and subtitle timing
-
Check voice consistency across clips
-
Confirm file format and bitrate
-
Ensure permissions for voice clones
-
Preview captions and translations
Narrow fixes save hours. If problems persist, open a support ticket with timestamps and sample clips.
FAQ — common questions about adding voiceovers to video
-
How do I clone my voice for video voiceovers?
Upload a clean 30 second sample and let the cloning model learn your tone. Quality depends on sample clarity and variety. DupDub's voice cloning works from a short clip, and you can fine-tune delivery in the editor. See DupDub docs for cloning best practices.
-
Which export formats should I use for voice over projects?
Choose WAV for final mastering, MP3 for small file delivery, MP4 for finished video, and SRT for subtitles. Export both audio and subtitle files so you can re-sync or repurpose later.
-
How accurate is audio and subtitle alignment for dubbing?
Auto alignment is usually strong, but expect to do light tweaks. Use frame-level scrubbers and manual slip edits for perfect sync when lip match matters.
-
Is my voice data secure, what about cloning privacy?
Use platforms that encrypt processing and lock cloned voices to the original speaker. Confirm retention and sharing policies in the service docs before uploading samples.
-
How do I reduce AI artifacts and make voiceovers sound natural?
Clean the source audio, pick a matching voice style, slow pacing slightly, add subtle EQ and de-essing, and apply short fades between lines. Preview on multiple devices and adjust prosody settings.




 Discord
 YouTube
 Tiktok
 Twitter
 Facebook
 Instagram