


TL;DR, Quick answer and recommended workflow
Why add a voice-over to PowerPoint? Benefits and common use cases
Key benefits
-
Better comprehension, because narration guides attention and explains visuals.
-
Stronger accessibility, through audio plus captions for diverse needs.
-
Wider reach, by repurposing narrated slides as on-demand training.
-
Consistent delivery, useful for branding and repeatable messaging.
Common use cases
-
E-learning and LMS courses: self-paced lessons and quizzes.
-
Training and compliance: repeatable, auditable instruction.
-
Sales and product demos: polished, on-demand pitches.
-
Global teams: paired with translated captions or dubbed audio.
When to record and when to present live
Option A — Record voice-over directly in PowerPoint (step-by-step)
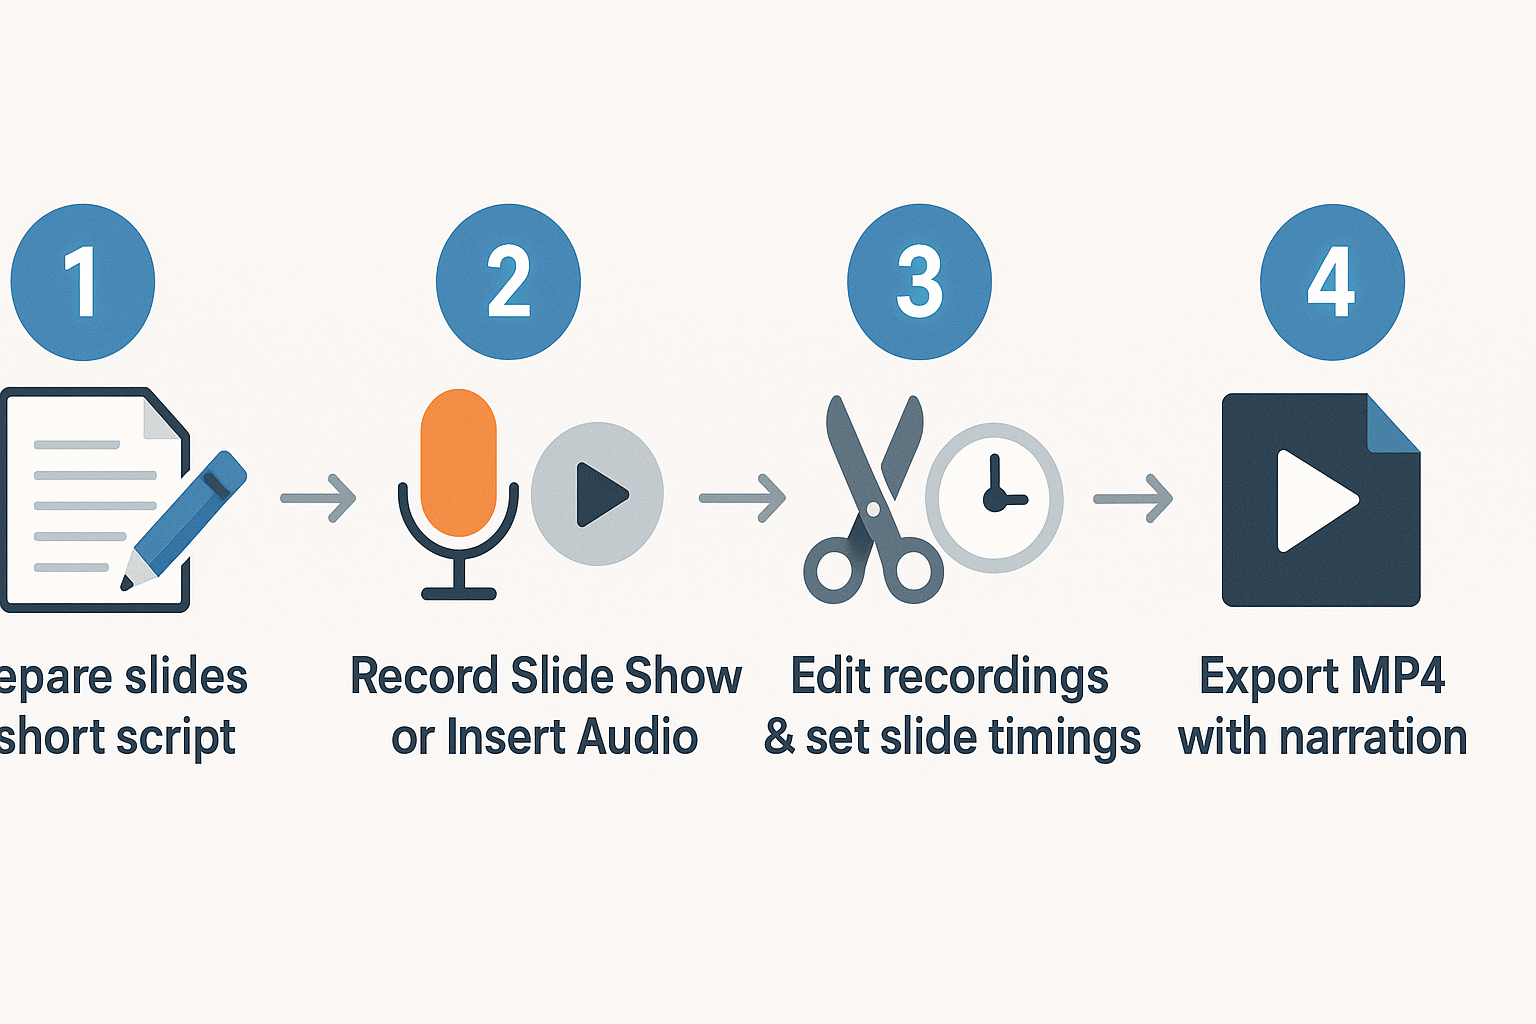
1) Prepare slides and a short script
2) Two recording options: Record Slide Show or Insert Audio
-
Go to Slide Show > Record Slide Show > Start Recording from Beginning or Current Slide.
-
Choose to record slide and animation timings and the microphone audio.
-
Record each slide, advance slides when done. PowerPoint saves audio and timings per slide.
-
Select a slide, then Insert > Audio > Record Audio.
-
Record a short clip and name it. Repeat per slide.
-
You can place clips on the timeline and set their play options (Automatically or On Click).
3) Edit recordings and set slide timings
4) Export with narration as MP4
Quick mic and room tips
-
Use a USB condenser or dynamic mic for clear voice. Laptop mics are OK for rough drafts.
-
Record in a quiet room with soft surfaces to cut echo. Towels or a closet work well.
-
Keep mic 6–12 inches away and use a pop filter for plosives.
-
Lower input gain to avoid clipping; test levels so peaks sit around 75% of max.
Option B — Record with Loom or a screen recorder and insert into PowerPoint
Step-by-step Loom workflow
-
Open Loom and pick record mode: Screen only, Screen + Cam, or Cam only. Choose the full screen, app window, or Chrome tab you want to capture.
-
Click record and narrate your slides while you click through any demos or apps. Pause or stop when done.
-
Trim the start and end inside Loom's editor to remove dead space. Use the cut tool to remove mistakes.
-
Export or download the clip as an MP4. Name the file clearly, for example Slide01_Demo.mp4.
-
In PowerPoint use Insert > Video > This Device, pick the MP4, then resize and position the player on the slide.
-
Set playback options: Playback tab > Start Automatically or On Click, and check Play Full Screen if desired. Use Animation Pane to sync the video with slide builds or transitions.
Pros, cons, and when to pick Loom
-
Superior screen capture and webcam framing, good for step-by-step demos.
-
Simple, browser-based trimming and quick re-records.
-
Picture-in-picture and audience-facing camera make presentations more personal.
-
MP4 files are bigger than PowerPoint's native audio clips.
-
Extra steps: export, import, and possibly re-sync timings.
-
Requires Loom account or alternative recorder.
-
Trim in Loom, then test playback in PowerPoint on the target device.
-
Use Rehearse Timings to lock slide timings if you want automated playback.
-
Compress media (File > Compress Media) in PowerPoint to reduce file size.
Option C — Use DupDub (AI TTS & voice cloning) to create professional voice-overs
Quick step-by-step workflow
-
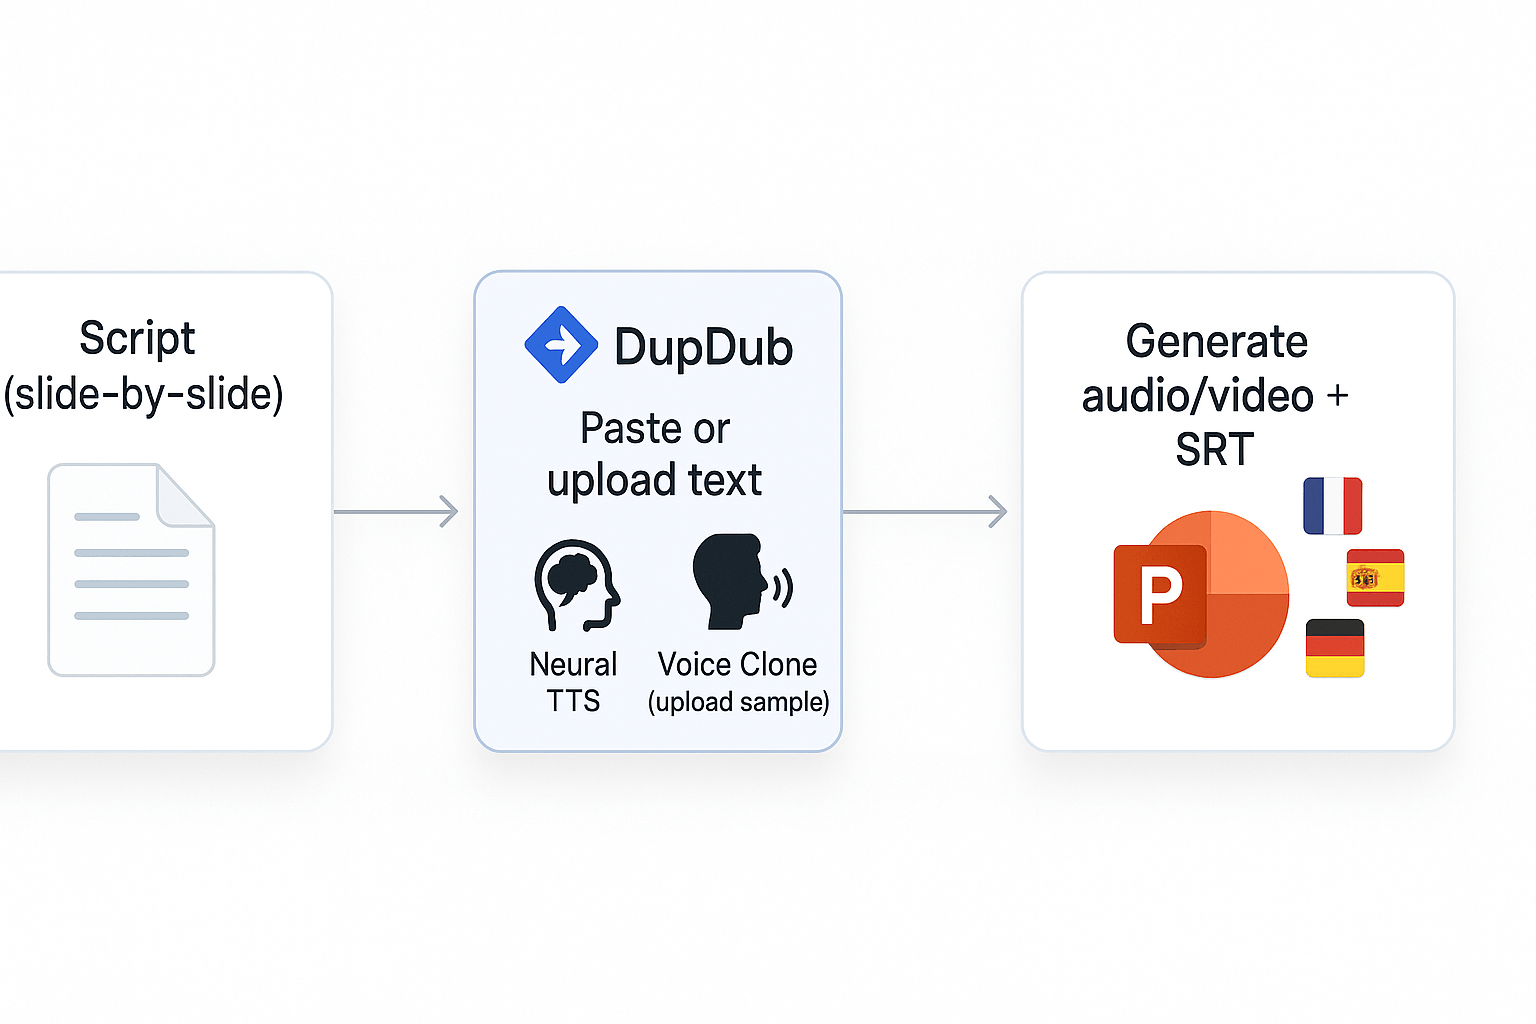
Prepare your script. Write a short, slide-by-slide script. Mark pauses, pronunciations, and timing in brackets so audio matches slide length. Keep lines under 20 seconds when possible.
-
Paste or upload text to DupDub. Create a new project, then paste the full script or upload a transcript. Use the editor to split text by slide or scene.
-
Pick a voice: neural TTS or clone a speaker. Choose from 700+ voices or upload a short sample (about 30 seconds) to clone a brand or presenter voice.
-
Preview and tweak. Use the online editor to adjust pacing, emphasis, and SSML-style controls (if available). Trim or re-align lines to match slide timings.
-
Generate and export. According to DupDub Text-to-Speech Features, DupDub supports exporting audio in WAV and MP3 formats, video in MP4 format with or without subtitles, and subtitle files in SRT format. Export MP3 or WAV for audio-only, or MP4 if you want a narrated video of slides.
-
Import into PowerPoint. For audio per slide, insert the MP3/WAV on each slide and set playback to start automatically or on click. For a single video, insert the MP4 as a slide or link and let it play across slides.
When DupDub saves time and money
-
Multilingual dubbing: Translate the script and generate matched audio in dozens of languages, so you avoid hiring local voice actors.
-
Brand voice consistency: Clone a single brand voice and use it across all decks, webinars, and training.
-
Fast iteration: Re-run TTS after copy changes, export a new MP3, and swap files in minutes, no re-recording.
Pro tips for smooth integration
-
Export SRT subtitles and import them into PowerPoint or provide them as a transcript for learners.
-
Use short audio clips per slide to make edits quick, instead of one long file.
-
Keep a naming convention: Slide01_en.mp3, Slide01_es.mp3, Slide01_srt.srt. It speeds bulk imports.
Comparison: PowerPoint vs Loom vs DupDub, quick table & recommended pickers
Quick comparison table
|
Tool
|
Audio quality
|
Editability
|
Multilingual support
|
Cost considerations
|
Export types
|
|
PowerPoint (native)
|
Good for simple narration, depends on mic
|
Basic slide-by-slide re-record or trim
|
Very limited, manual process
|
Low, built into Office 365
|
PPTX, embedded WAV/MP3 on export
|
|
Loom (screen recorder)
|
Clear conversational audio, includes system sound
|
Trim, cut, and re-record clips in browser
|
Limited auto-translate, captions only
|
Low to mid, free tier available
|
MP4, captions (VTT)
|
|
DupDub (AI TTS & voice cloning)
|
Studio-grade neural voices, consistent clones
|
Full text edits, re-voice in seconds
|
90+ TTS languages, 47-clone languages
|
Tiered pricing, pay-as-you-go options
|
MP3, WAV, MP4, SRT
|
Recommended picks by use case
-
Rapid internal training: Loom. Record fast, share instantly, keep costs low. Use Loom when speed beats polishing.
-
Polished e-learning: PowerPoint plus DupDub. Author slides in PowerPoint, then use DupDub for studio-quality TTS or voice cloning and export MP3/WAV for consistent lessons.
-
Translated or localized decks: DupDub. Its multilingual TTS, subtitle exports, and re-voicing save hours and keep voice consistent across languages.
Scriptwriting, accessibility & legal considerations
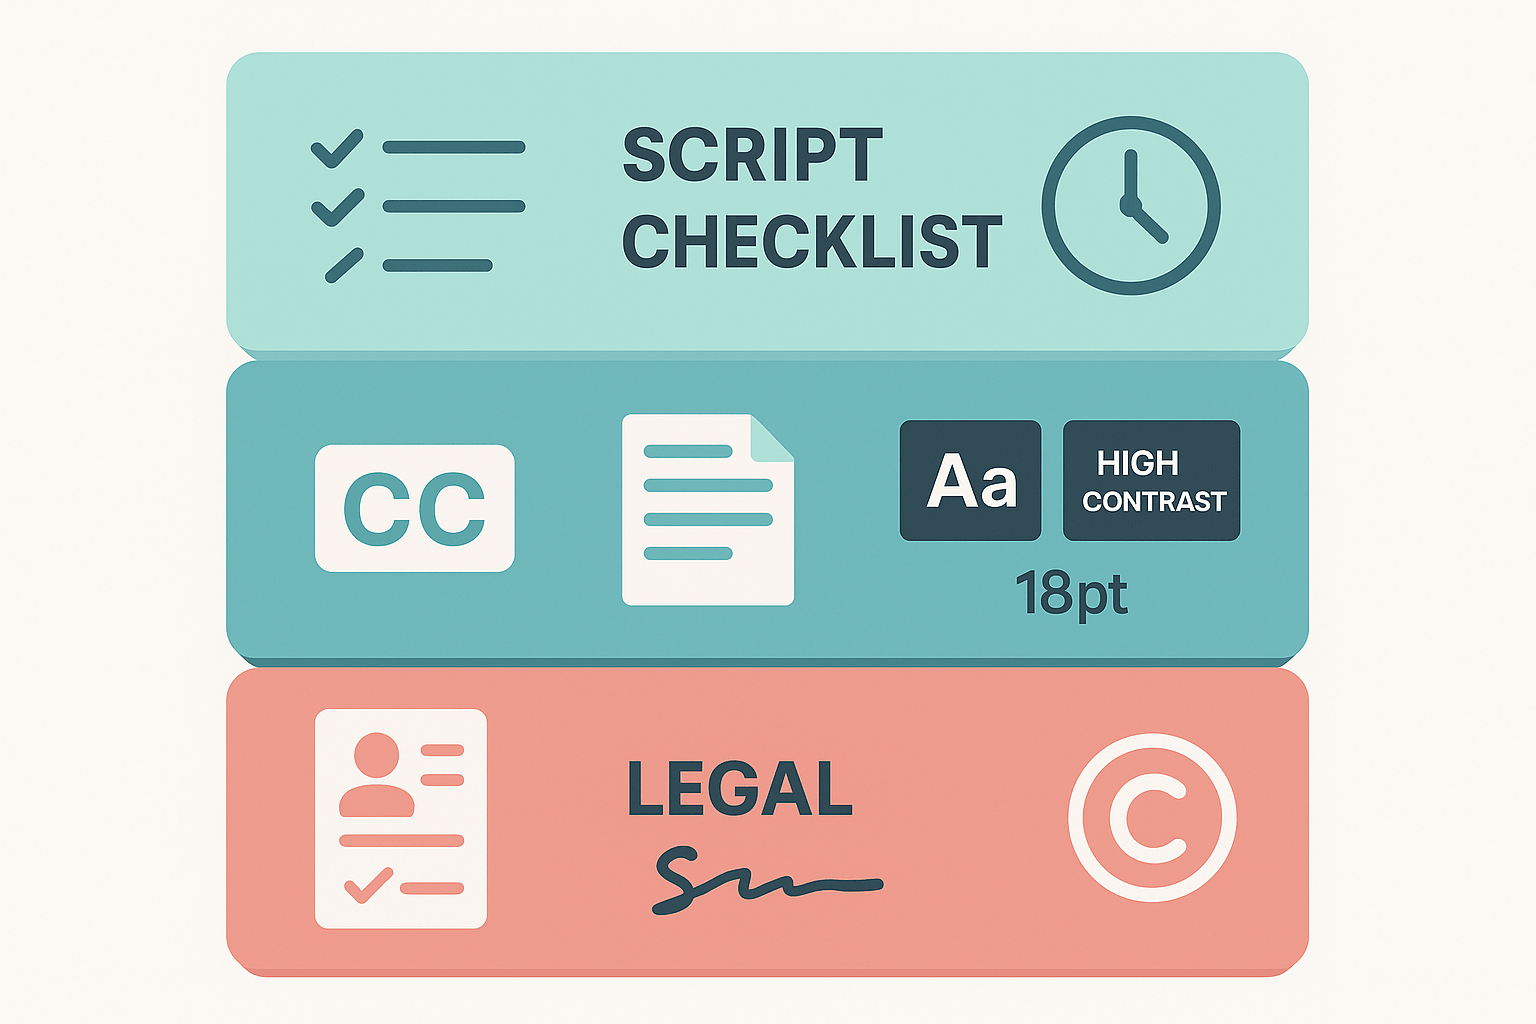
Script checklist: keep slides short and voice tight
-
Aim for 20 to 45 words per slide. Short slides read faster and match spoken pacing.
-
Speak at 140 to 160 words per minute for clear comprehension. Pause 1.0 to 1.5 seconds between bullets.
-
Start each slide with a one-sentence headline, then 1 to 3 supporting bullets.
-
Add one clear CTA per deck, placed near the end of the slide notes and spoken aloud.
-
Use the copy-ready script template: Headline (1 line). Two talking points (one sentence each). Spoken CTA (one short sentence). Timing note: 10 to 20 seconds per slide.
Accessibility beyond captions
-
Provide a full transcript file alongside the deck and link it from the first slide and the file metadata.
-
Ensure captions are verbatim for technical terms and optional speaker IDs when multiple voices appear.
-
Design visuals for readability: 18pt minimum body font, high contrast (WCAG AA or higher), and 1.5 line spacing.
-
Pace narration to allow cognitive processing: read one bullet, pause, then move to the next.
Legal must-dos for voice cloning and third-party audio
-
Get written consent for any voice clone. Keep signed records and a sample audio file that proves permission.
-
Verify licenses for music, SFX, and stock audio. Use Creative Commons only if the license allows your use case and requires attribution.
-
If you use an AI service for cloning, confirm the provider’s data and privacy terms, and confirm the clone is locked to the original speaker.
-
When in doubt, attribute sources in slide notes and offer a link in the transcript file.
Troubleshooting common audio issues and pro fixes
Quick fixes for common problems
-
Mic not detected: open your OS sound settings and the app's input menu. Pick the correct device and test levels. Restart the app if the mic still doesn't appear.
-
Low or noisy levels: raise input gain slightly, not so much that clipping happens. Use a pop filter and speak 6-12 inches from the mic.
-
Background noise and hum: apply a noise gate (cuts quiet noise) or noise reduction in your editor. For recurring hum, unplug nearby electronics or change room placement.
-
Echo and room reverb: poor room acoustics cause echo. Add soft materials, record in a closet, or use a close-mic technique.
-
Harsh or dull voice: use simple EQ (equalization) to cut low rumble at 80-120 Hz and boost presence slightly at 3-6 kHz. Keep changes subtle.
-
Sync and timing errors: trim or nudge clips on the slide timeline. For slide-to-audio sync, preview slide transitions while playing audio.
When to re-record versus edit
-
Re-record when clipping (distortion) is present. Distortion cannot be fixed reliably.
-
Re-record if the speaker used the wrong script or pronounced key names wrong.
-
Edit for small issues: single breaths, brief noises, or level inconsistencies.
-
If more than 30 to 60 seconds of audio needs fixes, re-record that slide. It’s usually faster.
Final QA checklist
-
Play full presentation on headphones and speakers.
-
Check waveform for clipping peaks and long silences.
-
Verify slide timing and spoken cues match.
-
Confirm captions or SRT files align.
-
Export a short MP4 or WAV and test on the final device.
Spot issues on export before sharing
-
Listen to the exported file from start to finish with the video or slides.
-
Scrub the timeline for sync drift and abrupt cuts.
-
Check levels across the file so quiet parts aren't too low.
-
Ask one teammate to review the exported file quickly. Fresh ears catch things you miss.
FAQ — People Also Ask and product-centric questions
-
How long should a voice-over be per slide for presentations?
Aim for short, focused narration. For business slides keep voice-overs about 20 to 40 seconds per slide so viewers can absorb visuals and audio together. For dense e-learning the sweet spot is 30 to 90 seconds with clear sections and a quick recap, and avoid slides longer than 90 seconds without interaction.
-
Can I use AI voices for commercial use in PowerPoint?
Maybe, but you must check the provider terms and any voice-clone permissions. Many commercial AI platforms allow use with a paid plan, but you must own rights to the source voice if cloning a real person. When in doubt, get written consent and review the platform license before publishing.
-
How do I add captions and transcripts to PowerPoint recordings?
PowerPoint has built-in captions and a transcript export, or you can generate SRT files with a transcription service and add them to the exported video.
Quick options:
Use Record Slide Show, enable Subtitles in the Recording tab, then export as MP4.
Export audio as WAV/MP3 and run speech-to-text to create an SRT.
Upload the MP4 to a captioning tool, then re-import the SRT into PowerPoint or your LMS. -
What are the best export formats for PowerPoint voice-overs?
For single-file sharing export as MP4: it embeds slides, timing, and audio. For separate audio tracks use WAV for highest quality or MP3 for smaller files. Export captions as SRT if you need editable subtitles or to feed into a localization workflow.
-
Is DupDub compatible with PowerPoint exports and workflows?
Yes, DupDub supports common formats you’ll need: MP3 and WAV for audio, MP4 for video, and SRT for subtitles and alignment. That lets you export a PowerPoint MP4, re-voice or translate it in DupDub, then download an MP4 or separate audio and SRT to replace the original. For multilingual or cloned-voice workflows see the Neural TTS cluster pages for tips on voice tuning and export settings.

 Discord
 YouTube
 Tiktok
 Twitter
 Facebook
 Instagram