How to add voiceover to Instagram Reels: two fast options exist. Record inside Instagram for quick narration. Or export your clip and add an AI voice for consistent, localized, faceless content.
Recommended workflow for most creators:
-
Quick edits: open Reels, tap the mic icon, record or trim a live voiceover in the app.
-
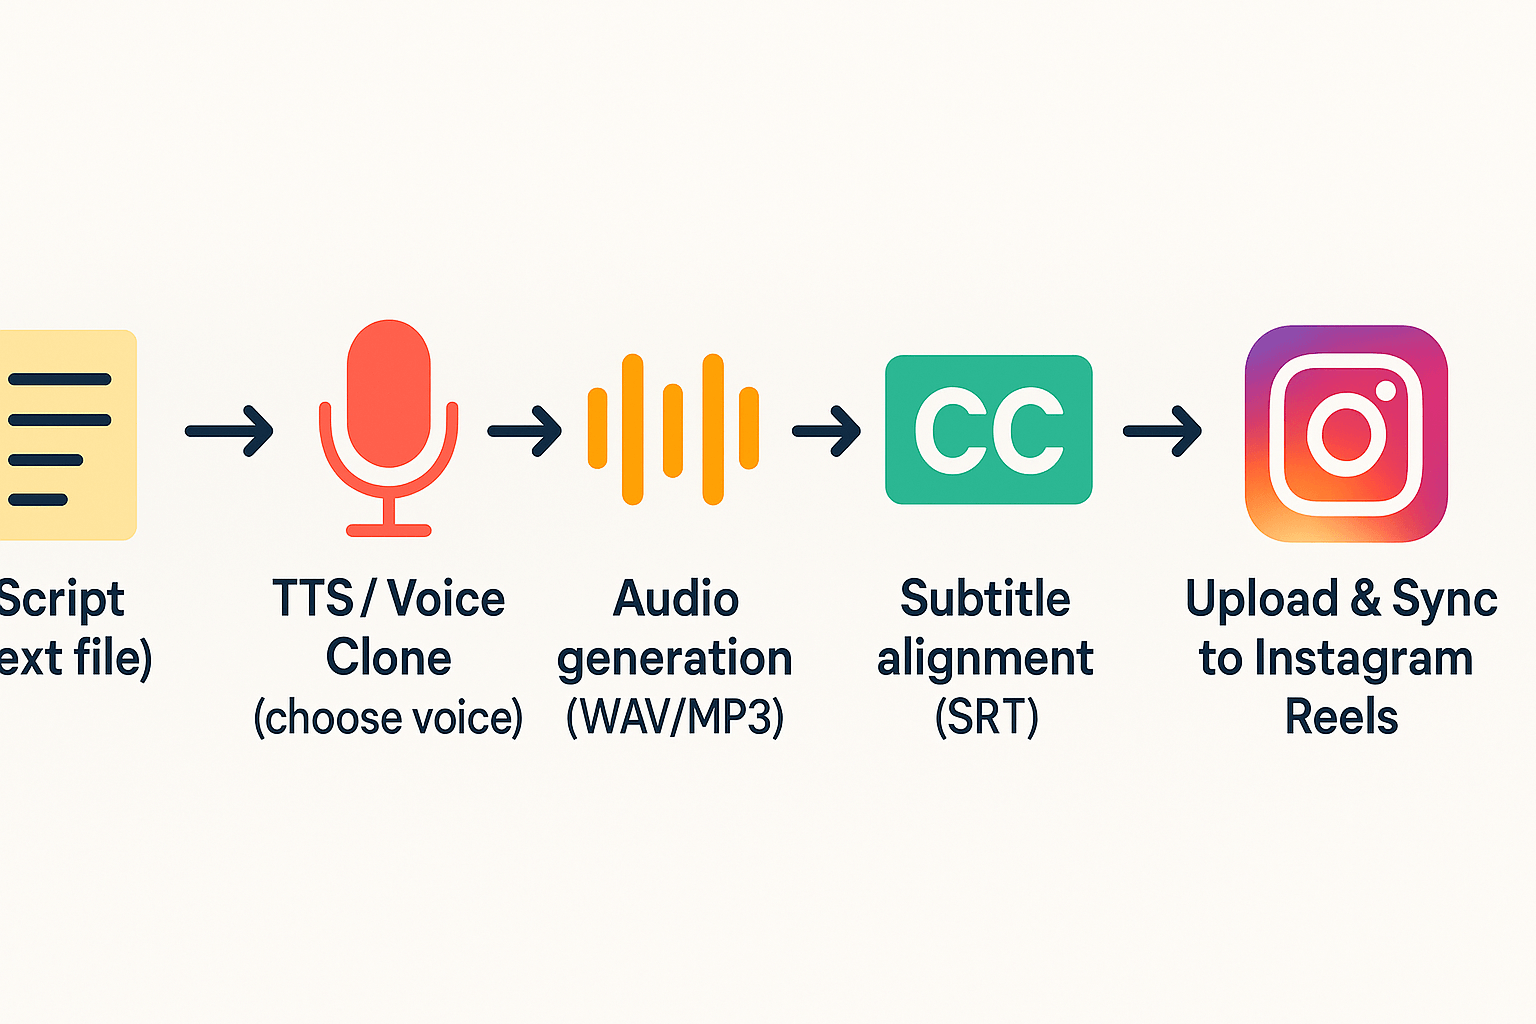
Scalable faceless: export MP4, transcribe the track, generate TTS or a cloned voice, then align subtitles and re-import the dubbed audio.
-
Batch plan: test one AI-dubbed Reel, review engagement, then scale with templates and voice briefs.
When to use each: use Instagram's native voiceover for fast, personal clips or last-minute fixes. Choose an AI workflow when you need a steady brand voice, translations, or high-volume production at scale.
Why voiceovers boost Instagram Reels (and why faceless creators win)
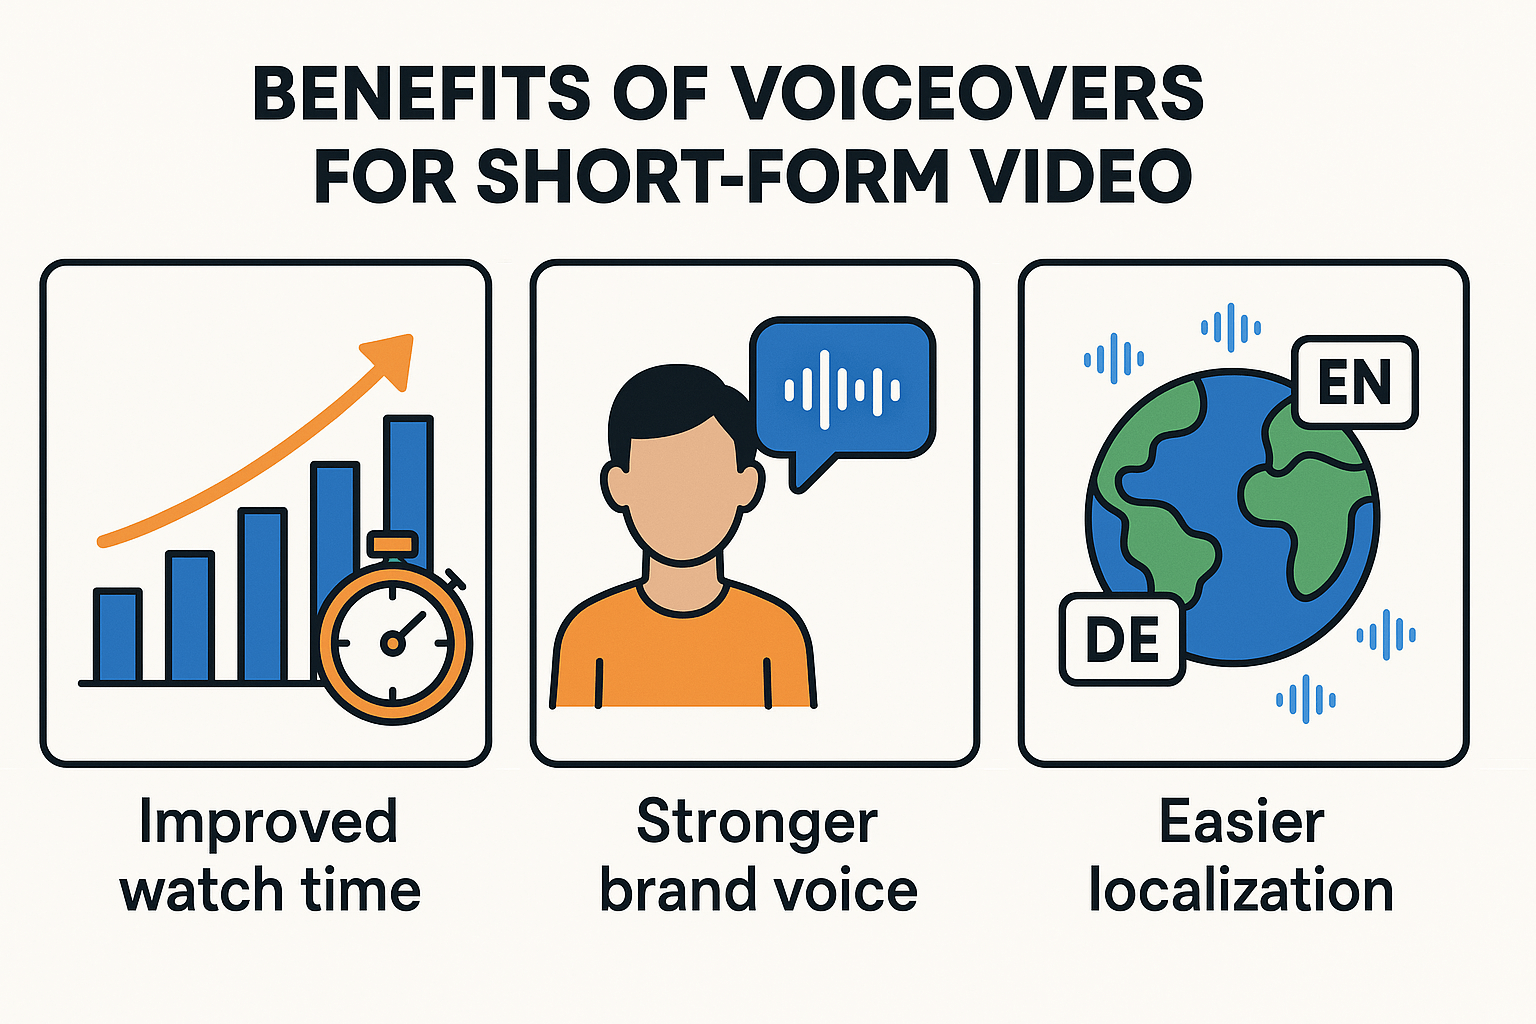
If you want to know how to add voiceover to Instagram Reels, start with why voice matters. Voiceovers make short videos easier to follow, hold attention, and encourage rewatches and shares. For creators and teams, the right voice turns short clips into clear, memorable stories.
Boost watch time and clarity
Voice gives context fast. A short voiceover can explain intent, call out the hook, and guide viewers through the clip in seconds. That clarity reduces dropoff because viewers understand the message right away, so they stay longer and are likelier to watch again.
Increase shareability and accessibility
Audio plus readable captions make content more shareable across platforms and audiences. Voice helps convey tone and urgency, while subtitles (auto-generated text) help viewers who watch muted or in public. That combo lifts reach without extra filming time.
Why faceless creators scale faster
A consistent synthetic voice or cloned narrator standardizes your brand sound. That consistency improves recognition, and it lets teams batch-produce dozens of Reels without reshooting. Faceless creators also protect privacy, iterate faster, and reuse voice assets in multiple languages through text-to-speech (TTS) and voice cloning.
Short use cases:
-
Product teasers: A crisp voiceover highlights key features, so viewers understand value in one view.
-
Explainers and tutorials: Step-by-step narration reduces confusion and increases completion rates.
-
Multilingual dubs: Localized voiceovers expand reach without new shoots.
Practical impact for social media managers and growth teams:
-
Faster content churn: script, synthesize voice, and publish in hours not days.
-
Consistent branding: one voice across formats boosts recognition.
-
Lower production cost: no studio time or actor bookings for every clip.
-
Easier testing: swap voices or languages to A/B headline and hook performance.
Voiceovers are a small production change with a big payoff. They lift watch time, clarify your message, and let faceless creators scale a consistent brand voice across markets and campaigns.
How to add a voiceover in the Instagram app — step-by-step (native method)
This section gives a clear, beginner friendly walkthrough of recording or uploading audio inside the Instagram Reels editor. You will learn the Music icon to Voiceover path, how to retake clips, how to adjust clip volume, and practical tips for syncing short narration to on screen actions. If you want a quick how to add voiceover to instagram reels guide, follow these steps and the checklist below.
Prepare your clip and open the Reels editor
Start by opening Instagram and creating a new Reel. Record or import the video clips you want to narrate. Keep clips short when you plan spoken narration, it makes timing easier.
Record a voiceover inside the editor: step by step
-
Tap the Music icon in the left toolbar while in the Reels editor. Then choose the Voiceover tool (microphone icon). This opens the recorder tied to the reel timeline.
-
Scrub the timeline to the exact frame where you want the narration to start. The preview scrubber helps you see the action while you record.
-
Press Record and speak. Record in short takes, one sentence or action at a time. Stop between lines to give yourself room for edits.
-
After each take, play back the segment to confirm timing. Use the Delete or Undo button to remove a bad take and re-record immediately.
-
Repeat for each segment. When done, tap Save or the check mark to add the combined voiceover to the reel.
Upload a premade audio file instead of recording
If you prefer to use a pre-recorded narration, tap the audio panel and look for the Import or Upload option. Choose an MP3 or WAV file from your device. After import, scrub the timeline and trim the audio clip to align with on screen beats.
Adjust clip and voiceover volume
Tap the audio mixer or the clip to reveal volume controls. You usually get two sliders: original audio and added audio. Lower the original clip volume if the background sound competes with your voice. Increase the voiceover level so narration is clear, but avoid clipping or distortion.
Sync narration to on screen actions
Syncing is easiest when you record in short snippets. Match each sentence to a clear visual action. Use the timeline to nudge the start point by a few frames until the words match the motion. If timing still feels off, re-record that short take, not the whole track.
Practical tips for clean native voiceovers
-
Use quiet space and hold the phone mic about 6 inches from your mouth.
-
Wear earbuds with a built in mic for clearer sound when needed.
-
Speak at a steady pace and leave short pauses between phrases.
-
Preview the whole Reel at full volume, on and off headphones.
-
Add auto captions in Instagram after you save the voiceover, to improve accessibility.
Common native mistakes that waste time or lower quality
-
Recording one long take and redoing the whole thing for one bad line. Record short clips instead.
-
Forgetting to lower the original clip volume, leaving music or ambient sound to drown the voice.
-
Not using the timeline scrubber, which causes misaligned starts and awkward pauses.
-
Ignoring background noise such as air conditioning or traffic. A re-record later is slower than fixing the environment first.
Quick publish checklist
-
Play the whole reel and check voice level against music.
-
Trim any silent lead or tail from voice clips.
-
Add captions or subtitles for accessibility.
-
Preview on a mobile speaker and on headphones.
-
Export and post when both audio and visuals feel tightly synced.
Third-party workflows vs. Instagram native: pros and cons
A quick comparison helps you pick the right path for how to add voiceover to instagram reels. Native Instagram voiceover is fast and simple. Third-party AI tools add quality, localization, and scale when you need them.
When the Instagram native voiceover works
Use the native recorder when you need a quick, on-phone narration. It’s fine for short personal clips, behind-the-scenes updates, and voice notes. No exports, no extra accounts, and no file juggling. You keep everything in the app, which saves time.
When third-party AI tools beat native audio
Turn to external tools when you want consistent sound, many languages, or bulk dubbing. AI tools give studio-level clarity, voice cloning, and matched accents. They also automate subtitle alignment and multiple exports. If you’re publishing many Reels, they save hours.
Trade-offs: cost, control, and privacy
There are three clear trade-offs to weigh: price, creative control, and data handling.
|
Attribute
|
Instagram native
|
Third-party AI tools
|
|
Audio quality
|
App mic, variable
|
Studio TTS or cloned voice
|
|
Localization
|
Manual recording per language
|
Automated translation and dubbing
|
|
Scaling
|
Slow for many videos
|
Batch exports and APIs
|
|
Cost
|
Free
|
Often subscription or credits
|
|
Control
|
Limited editing tools
|
Fine-grained voice and timing control
|
|
Privacy
|
Data stays in app
|
Depends on vendor policies
|
Top third-party options creators ask about
-
DupDub: Built for cross-language scaling and subtitle alignment. It handles TTS, voice cloning, transcript sync, and batch exports, which speeds global publishing. Many creators pick it for its alignment tools and avatar options.
-
ElevenLabs: Known for hyper-realistic TTS and expressive voices. Great for single-voice realism.
-
Murf: Good for marketing teams, with easy editors and presets.
Each vendor has strengths. Choose based on volume, language needs, and budget.
How to add voiceover to Instagram Reels using DupDub, end-to-end tutorial
This step-by-step guide shows how to add voiceover to instagram reels using DupDub and the Instagram app. You’ll learn a DupDub-first workflow: write a short script, time-map lines, pick or clone a voice, generate and polish audio, then export and sync to Reels with captions. The focus is faceless creators who need speed, consistency, and scalable localization.
Prep your script and time-map
Start with a 15 to 45 second script. Short scripts increase clarity and engagement. Then do a time-map: note start and end seconds for each line. Time-maps keep audio and captions aligned when you export. Save the script as a simple text file or paste it into DupDub’s studio.
-
Write punchy lines, one idea per sentence.
-
Mark timestamps like 00:00–00:05 for each line.
-
Keep total length under 45 seconds for Reels.
Pick or clone a voice, fast
Choose a voice that matches your brand tone. DupDub has built-in TTS plus cloning if you need a signature voice. According to
DupDub's Multilingual TTS for eLearning, DupDub offers over 700 AI voiceovers across more than 90 languages and accents. That variety helps faceless creators keep a consistent sound while targeting new markets.
Tips:
Generate and fine-tune the TTS audio
Upload your script to DupDub or paste text into the TTS editor. Apply the time-map so each sentence gets a precise timestamp. Select your voice and generate a preview. Listen, then tweak speed, pitch, and pauses.
Useful shortcuts for faceless creators:
-
Use the built-in pause markers to match cut edits.
-
Add a short fade-in and fade-out to avoid pops.
-
Use auto-subtitle alignment so captions match speech timing.
Export settings that work with Reels
For audio-only workflows export MP3 or WAV. For a one-file upload that already contains captions, export MP4 with burned-in subtitles. Use these simple settings for Instagram Reels:
-
Audio: WAV, 44.1 kHz, 16-bit for best clarity.
-
MP3: 128–192 kbps if file size is a concern.
-
Video: MP4, H.264, 1080x1920 vertical or 1080x1350 square if you plan repurposing.
-
Subtitles: SRT for separate captions, or burn captions into MP4 if you want synced visual text.
Import and sync to Instagram Reels
-
Open Instagram and create a Reel. Add your footage or background clips.
-
Tap the audio icon to add your exported MP3 or import the MP4 directly.
-
Use the Trim tool to align the audio to the clip, matching your original time-map.
-
Add captions: upload the SRT or use Instagram’s auto captions and edit any errors.
-
Preview, then publish.
Batch localize and scale
Want multiple languages? Use DupDub’s batch mode to translate, synthesize, and align subtitles across languages. Quick workflow:
-
Duplicate your source reel project file.
-
Translate the script inside DupDub or upload translated text.
-
Apply the same time-map and generate voices for each locale.
-
Export separate MP3/MP4 files, then upload each localized Reel.
This saves time and keeps brand voice consistent across markets.
Quick publish checklist
-
Script proofed and time-mapped.
-
Voice chosen or cloned, previewed.
-
Audio exported with recommended settings.
-
Subtitles aligned and saved as SRT or burned in.
-
Final sync checked in Instagram preview.
Best audio practices for clear, engaging voiceovers
Good audio keeps viewers watching. This section covers simple mic and room advice, short script templates for 15 to 30 second Reels, and fast editing moves to cut breaths and filler words. It also shows how pacing and split second timing hold attention when you add voiceover to Instagram Reels.
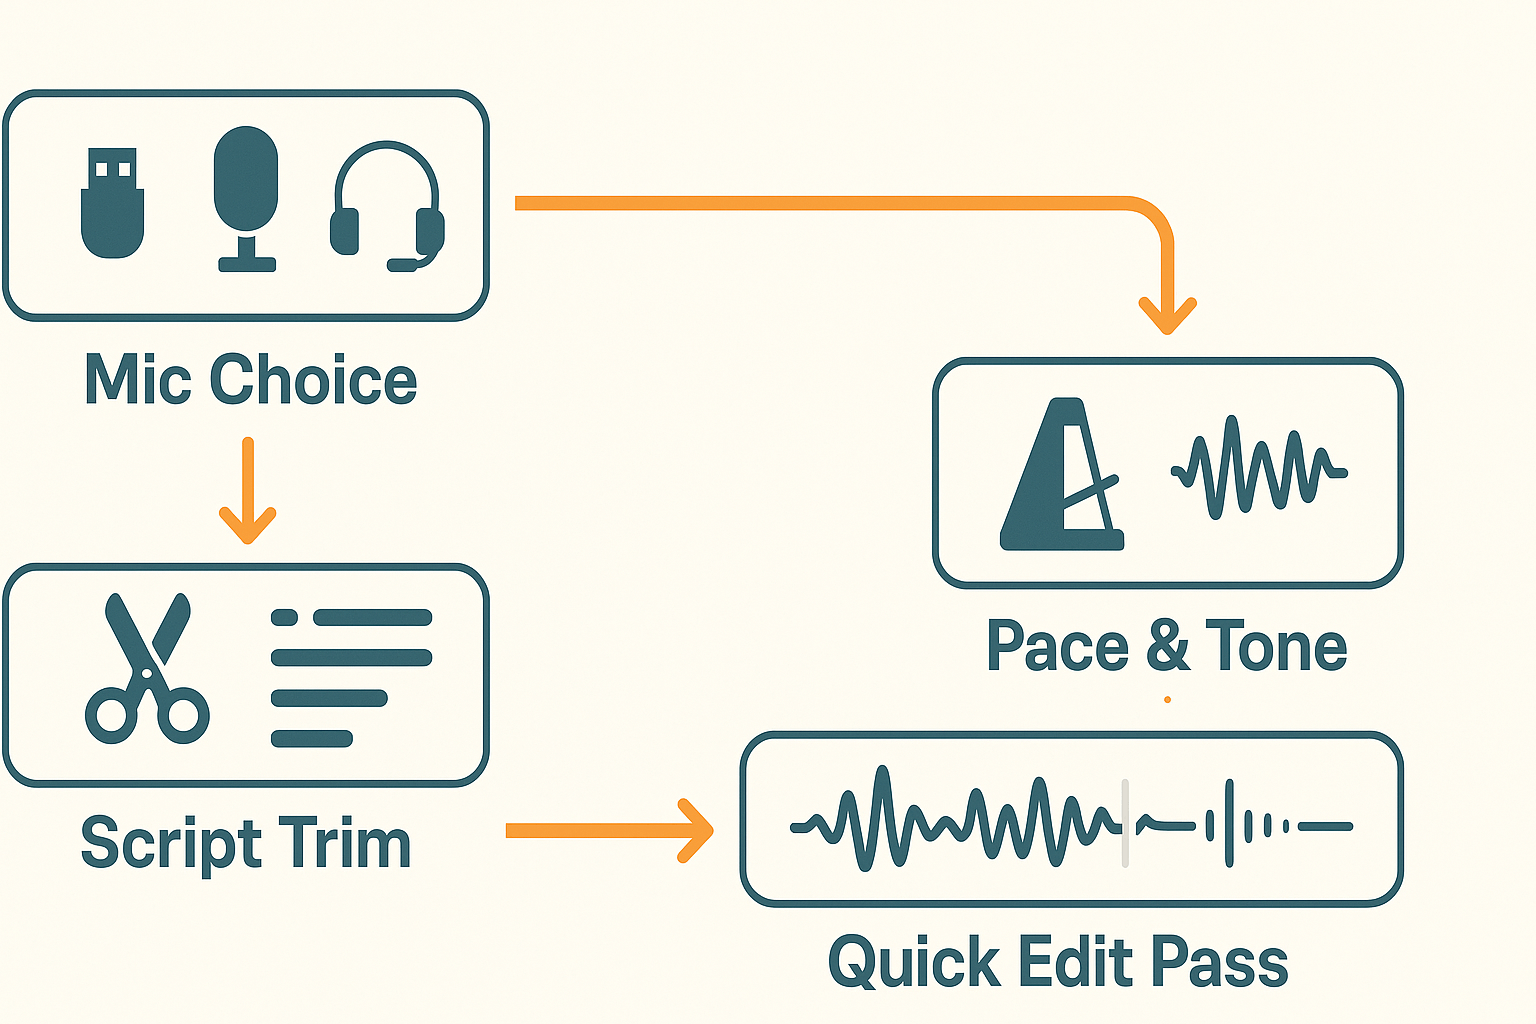
Pick the right mic and room
Use a mic you can afford, and treat the room like part of the mic. For budget setups, try a USB condenser or a dynamic podcast mic. Put a blanket or foam behind you and record close to the mic to cut room echo. For pro setups, use an XLR cardioid mic, a pop filter, and a small acoustic reflection shield. Always record at 44.1 or 48 kHz and 24 bit when possible.
Practical checklist:
-
Budget: USB mic, pop filter, soft surfaces, 1 to 2 feet from mic.
-
Mid-range: Audio interface, XLR dynamic mic, foam panels.
-
Pro: Studio mic, shock mount, treated room, headphone monitor.
Write tight scripts for 15 to 30 second Reels
Short scripts force clarity and speed. Aim for 30 to 45 words for 15 seconds, and 60 to 80 words for 30 seconds. Read scripts aloud and time them. Cut anything that does not move the story forward.
Script templates:
-
Hook (3s): “Stop scrolling if you want faster gains.” Body (8s): one quick tip. CTA (4s): “Save this.”
-
Hook (4s): “Here’s a brand trick I used.” Body (18s): 2 steps. CTA (3s): “Try it today.”
-
Hook (2s): “Quick fix.” Body (11s): demo. CTA (2s): “Follow for more.”
Edit fast: remove breaths and filler words
Open your editor and do one clean pass. Scan for "um," "uh," and long inhalations. Use short cuts to trim a fraction of a second from the breath, not the consonant. If a breath sits between words, cut it and add a 20 to 40 ms crossfade to avoid clicks.
Quick edits list:
-
Use waveform zoom to find breaths, then cut 50 to 150 ms. Add 20 ms fade.
-
Use a noise gate sparingly to remove low hum between phrases.
-
Normalize to -3 to -6 dB peak, then lightly compress.
Nail pacing, cadence and timing
Pacing makes short-form feel natural. Speed up slightly after the hook to keep momentum, then slow for the final CTA. Pause for visual beats: a 120 to 200 ms pause can sync voice and cut. Test with the video; if viewers drop off before the CTA, tighten the middle.
Publish-ready checklist:
-
Clean room noise and pop sounds.
-
Script fits target length when read aloud.
-
Breaths trimmed, fades added, light compression.
-
Voice syncs with key visual cuts and captions.
Legal, copyright & ethical considerations for Reels audio
Start by treating audio rights like a safety check. If you’re learning how to add voiceover to Instagram Reels, don’t skip rights and consent. Bad audio choices can trigger takedowns, account strikes, or legal claims, so plan permissions before you publish.
Get clear rights for music and sound effects
Always use licensed music or Instagram’s in-app library for background tracks. Commercial tracks and popular SFX often need a sync license (permission to pair sound with visuals). When in doubt, choose royalty free libraries that state commercial use is allowed, or buy a license that covers social and ad use.
Confirm consent for voice cloning and TTS
Treat cloned voices like a personal right. The U.S. Copyright Office's
Report on Copyright and Artificial Intelligence (Part 1: Digital Replicas) recommends the enactment of a federal digital replica right to protect individuals from unauthorized digital replicas of their likenesses and voices. Get written consent from any person you clone, keep that record, and limit uses to what they approve.
Disclose synthetic voices and avoid deception
Be transparent when you use synthetic voices. Add a caption or on-screen note when a voice is generated or cloned. Platforms and some countries view undisclosed synthetic content as misleading, and disclosure reduces the risk of community strikes.
Quick practical rules to follow
-
Use only licensed music or platform-provided tracks for Reels.
-
Get written consent for voice cloning, store it, and honor scope limits.
-
Don’t clone minors or public figures without explicit permission.
-
Check platform terms of service before automated reposting.
-
Follow local privacy and publicity laws (GDPR, state right-of-publicity rules).
Keep a permissions folder and a short attribution line in every post. That small effort prevents most enforcement issues and helps you scale faceless Reels with confidence.
Troubleshooting common audio and upload issues
Fast fixes you can run in five minutes to get a Reel sounding right and actually publishing. This section covers how to add voiceover to instagram reels sync checks, common upload errors, low-volume clipping, and file-format traps. Follow the short tests and re-exports below to confirm problems, then re-upload.
Quick checks to confirm audio sync
Do these three tests first, they take under two minutes. 1) Play the source file on your phone and watch lips or visual cues at the expected word. 2) Import the file into your editor and scrub the timeline to the problem point. 3) Export a 10-second clip around the error and test it in your phone’s default player. If the short clip shows the same issue, the file itself is out of sync.
Fix out-of-sync audio
Start simple, then re-export if needed. 1) Match frame rates: ensure video and timeline use the same frame rate, like 23.976, 24, or 30 fps. 2) Detach audio and nudge it by frames until lips align, then export. 3) If the drift grows over time, re-encode audio to constant sample rate (48 kHz) and re-mux with the correct frame rate.
Resolve Instagram upload errors
Try these quick server and file fixes. 1) Update Instagram and clear the app cache, then retry. 2) Shorten the clip under the platform limit and try again. 3) Re-export using standard settings (MP4 container, H.264 video, AAC audio) and upload from the phone, not desktop.
Low volume or clipping
Don’t boost raw gain blindly. 1) Normalize audio to -3 dB or use a limiter to prevent peaks. 2) Export with headroom, keeping peaks under -1 dBFS. 3) Test on phone speakers and earbuds to confirm clarity.
File-format and export fixes
Use these safe export settings before another upload: MP4 container, H.264 video, AAC audio, 48 kHz sample rate, and 128–192 kbps audio bitrate. If Instagram rejects the file, re-encode with a tool like HandBrake or a quick FFmpeg command and retry.
Five-minute troubleshooting checklist
-
Play a 10-second export on your phone.
-
Match frame rate and re-export.
-
Normalize peaks to -1 to -3 dB.
-
Export MP4 H.264 with AAC, 48 kHz.
-
Update Instagram and clear cache.
These steps fix most sync and upload problems quickly. If the issue persists, recreate the clip at a fresh export and try a different phone or network.
Measure success: analytics & optimization for voiceover Reels
Start with the right metrics and you’ll know what to change next. When you track how to add voiceover to instagram reels, prioritize watch time, completion rate, saves, and shares. Those engagement signals tell Instagram your Reel is valuable, and they predict reach better than raw views.
Focus on four KPIs that matter
Watch time: average seconds watched per view. Aim to increase it by shortening dead space and tightening narration.
Completion rate: percent of viewers who watch to the end. Voiceovers usually boost completion when pacing matches visuals.
Saves and shares: strong indicators of value. If people save or share, your content earns organic distribution and discovery.
Engagement rate: likes, comments, and profile visits. Use it to measure interest and prompt follow actions.
Run simple A/B tests to find what works
-
Define a single variable to test, like voice versus no voice. Keep everything else identical.
-
Create two versions, upload to comparable times and audiences, and run each for a set window, for example 48 hours.
-
Compare watch time, completion rate, saves, and shares. If one wins by a clear margin, roll it out.
-
Repeat with tone variants: friendly, authoritative, conversational, or different TTS voices.
Test ideas: human voice vs TTS, warm vs direct tone, scripted vs improvised pacing, and CTA placement at 3 seconds vs final frame.
Iteration checklist for every Reel
-
Title and first 3 seconds hook tested.
-
Voice pace matches cuts and captions.
-
Captions present and synced (for silent viewers).
-
CTA is clear, single-action, and in caption text.
-
Exported audio loudness normalized and noise reduced.
-
Run A/B test and log results in a tracker.
Keep a simple spreadsheet of test variables, sample size, and lift percent.
Captions and CTAs move the needle. Captions increase retention for viewers who watch muted. Clear CTAs in audio and caption text improve conversions for growth teams and small business owners. Use insights to optimize future scripts, voice selection, and localization strategies for scalable results.
FAQ — Common questions creators ask about voiceovers for Reels
-
Can I upload an MP3 when learning how to add voiceover to Instagram Reels?
Yes. Instagram supports MP3 when adding audio inside the Reels editor by importing from your device or using the audio tool. For precise timing, you can export a WAV from your editor or align transcripts and subtitles in a tool like DupDub before upload.
-
Is AI voice legal for Reels and creator use?
Usually, yes—if you have the legal right to use the voice and content. Obtain written permission before cloning a real person’s voice, and follow platform rules and disclosure laws for endorsements and sponsored content.
-
How can I make AI voices sound more natural for Instagram Reels voiceovers?
Choose a voice that matches your tone and pacing. Add subtle micro-pauses and trim unnatural gaps in your editor. Layer light room tone or contextual sound effects to reduce a robotic feel. Write short sentences with contractions so TTS reads more conversationally.
-
Will Instagram demote Reels with synthetic or AI-generated audio?
There is no inherent penalty for synthetic audio. Instagram primarily ranks content based on engagement signals. Avoid spam tactics, maintain high audio quality, follow community guidelines, and include captions to improve accessibility and retention.
-
How do I add multilingual voiceovers? (Quick localization workflow for Reels)
1. Transcribe the original audio.
2. Translate and localize the script.
3. Generate TTS or a voice clone in the target language.
4. Align subtitles and export as MP3/MP4.
AI tools can automate transcription, translation, and subtitle sync for faster turnaround.
-
What file formats, length limits, and caption tips should I follow for Reels voiceovers?
Export audio as MP3 or WAV and video as MP4. Keep Reels concise—under 30 seconds often improves completion rates. Add clear, readable captions and test loudness on mobile devices before publishing.




 Discord
 YouTube
 Tiktok
 Twitter
 Facebook
 Instagram